CyberPusher · Auto-submit
Push your stock files to every marketplace — automatically
CyberStock writes your titles and keywords. CyberPusher delivers each file to Shutterstock, Adobe Stock, Pond5, Getty/iStock and more — by FTP or by clicking Submit for you in your own browser. No commission, ever.
CyberPusher is the auto-submit (distribution) part of CyberStock. It sends your stock photos and videos to every marketplace you choose using two channels: FTP (files upload with metadata already embedded) and browser automation (it logs in to the contributor site and clicks Submit for you).
It charges 0% commission on sales, supports FTP to any platform, runs browser steps inside your own Chrome, can solve common CAPTCHAs via a connected anti-captcha service, and learns new platforms through Teach Mode.
0% commission
We never take a cut of your sales. Distributors that do can cost you forever.
FTP to any platform
If a site supports FTP/SFTP, you can push to it — even ones not in the list.
Fast & batch-ready
Push hundreds of files at once. One credit per file, any number of platforms.
Runs in your browser
Browser automation uses your own Chrome and real login — no passwords stored.
What is CyberPusher?
Think of CyberPusher as a robot assistant that does the boring part of being a stock contributor: uploading the same files to many websites and filling in the same details on each one. You set it up once. After that, you press a button and it does the uploading and submitting for you.
Getting started — from zero to submitted
Here's the whole journey, in order. Each step is explained in detail below.
- Choose Classic or v2
- Install the Chrome extension (first time only)
- Connect a platform — Automation or FTP
- Pick a mode — automatic or semi-automatic
- Run — push to several platforms at once
Step 1 · Choose Classic or v2
The first time you open Push, you'll see two cards. CyberPusher Classic is the step-by-step FTP/SFTP uploader (limited to platforms that have FTP). CyberPusher v2 is full automation — it works on all platforms, can submit for you, and needs no FTP credentials. You can switch anytime with the “Switch version” link.
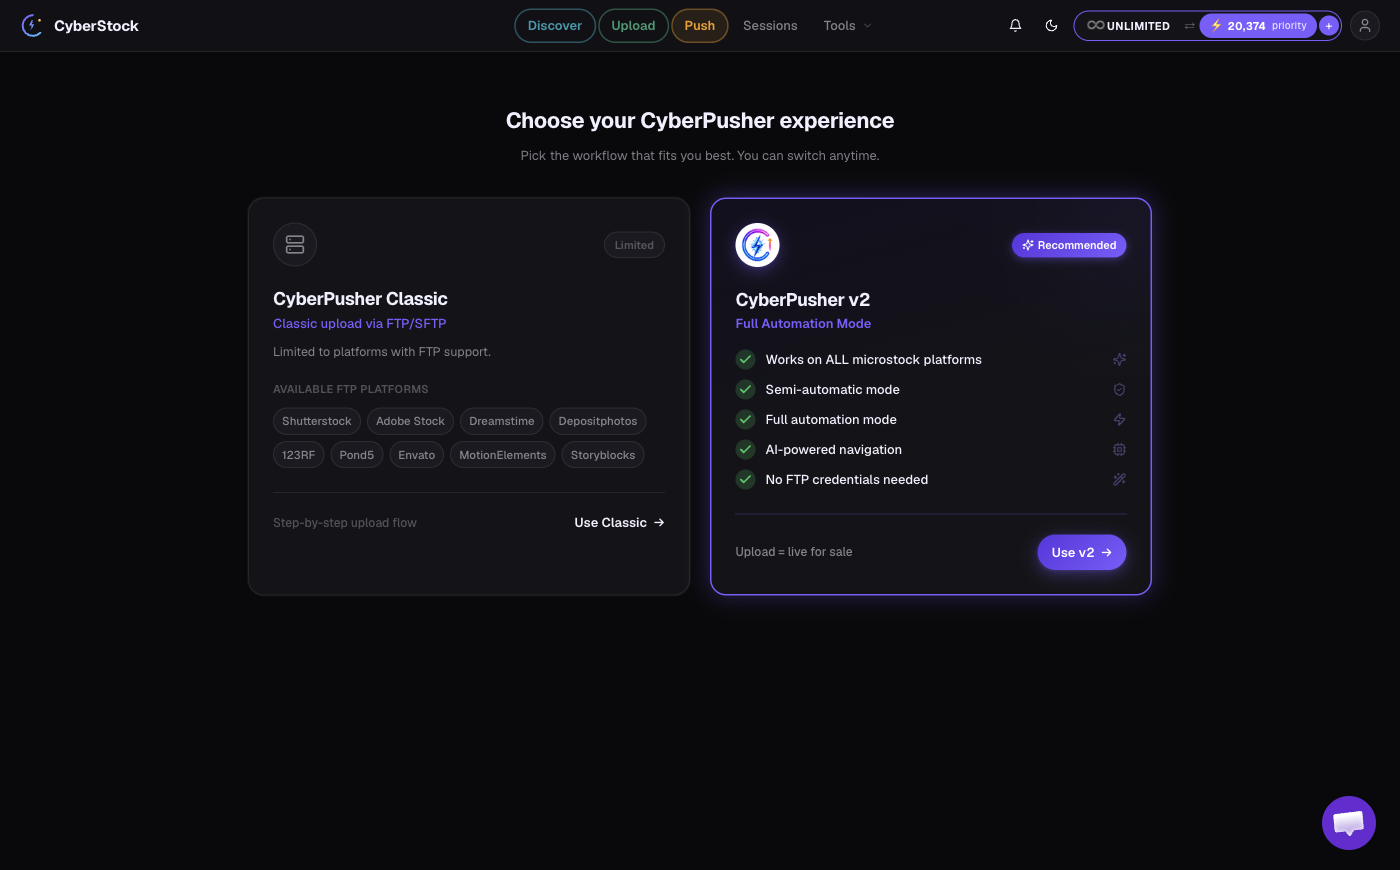
⚠️ CyberPusher v2 needs an active subscription
v2 is included with any active CyberStock subscription. If you joined back when CyberStock was credit-only (no subscription), you can still use CyberPusher Classic — to unlock v2's full automation, just start a subscription.
Step 2 · Install the Chrome extension (first time)
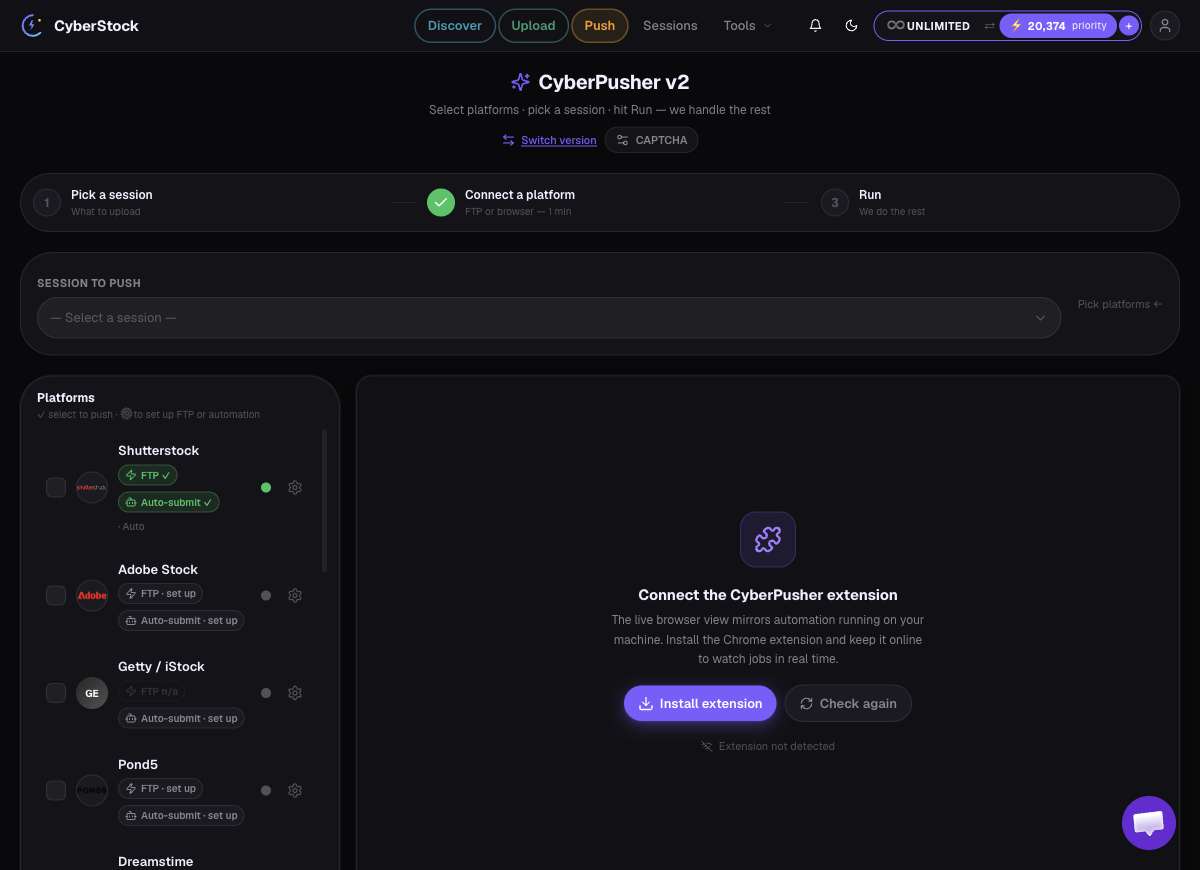
v2's browser automation runs through a small Chrome extension on your computer. The first time you open v2 you'll see a “Connect the CyberPusher extension” panel. Click Install extension, add it from the Chrome Web Store, then come back and press Check again — the panel turns green when it's connected. You only do this once. (FTP-only pushes don't need the extension.)
The two ways it delivers files
FTP and browser automation are complementary — you can use either, or both. Where a platform supports FTP, that's the fastest, hands-off path. Where it doesn't (or to press the final Submit), browser automation takes over. Many people connect FTP for delivery and browser automation for the on-site submit on the same platform.
FTP / SFTP (fastest)
CyberPusher writes your title, keywords and categories straight into each file (IPTC/XMP) and uploads it to the platform's FTP. Files arrive already filled in. Works for any site that supports FTP — even ones we don't list.
Browser automation (works everywhere)
Use it for sites that have no FTP, or for full automation on any platform. The Chrome extension opens the contributor page in your own browser and acts for you. In full-automatic mode it fills everything and clicks Submit; in semi-automatic mode it just uploads and fills what it can, then pauses so you do the final submit yourself.
Step 3 · Connect a platform
- Open CyberPusher and find the platform's card.
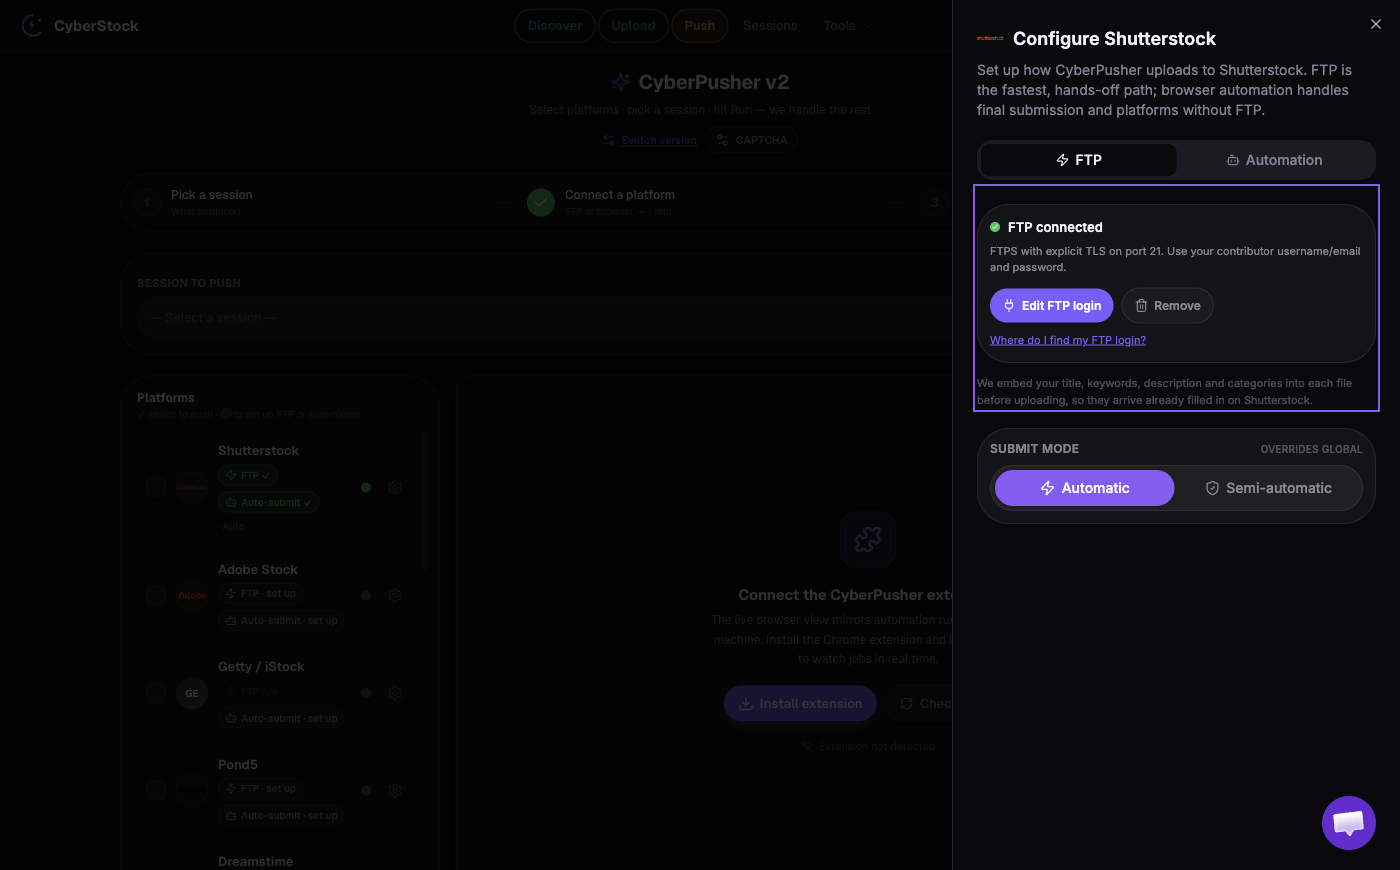
- Click the gear icon on the card. A settings panel slides in from the right.
- Pick a tab at the top: FTP or Automation.
- On the FTP tab, click Edit FTP login and enter the host, port, username and password from your contributor account. On the Automation tab, just log in to the platform once in your browser.
- Save. The card turns green when the connection is ready.
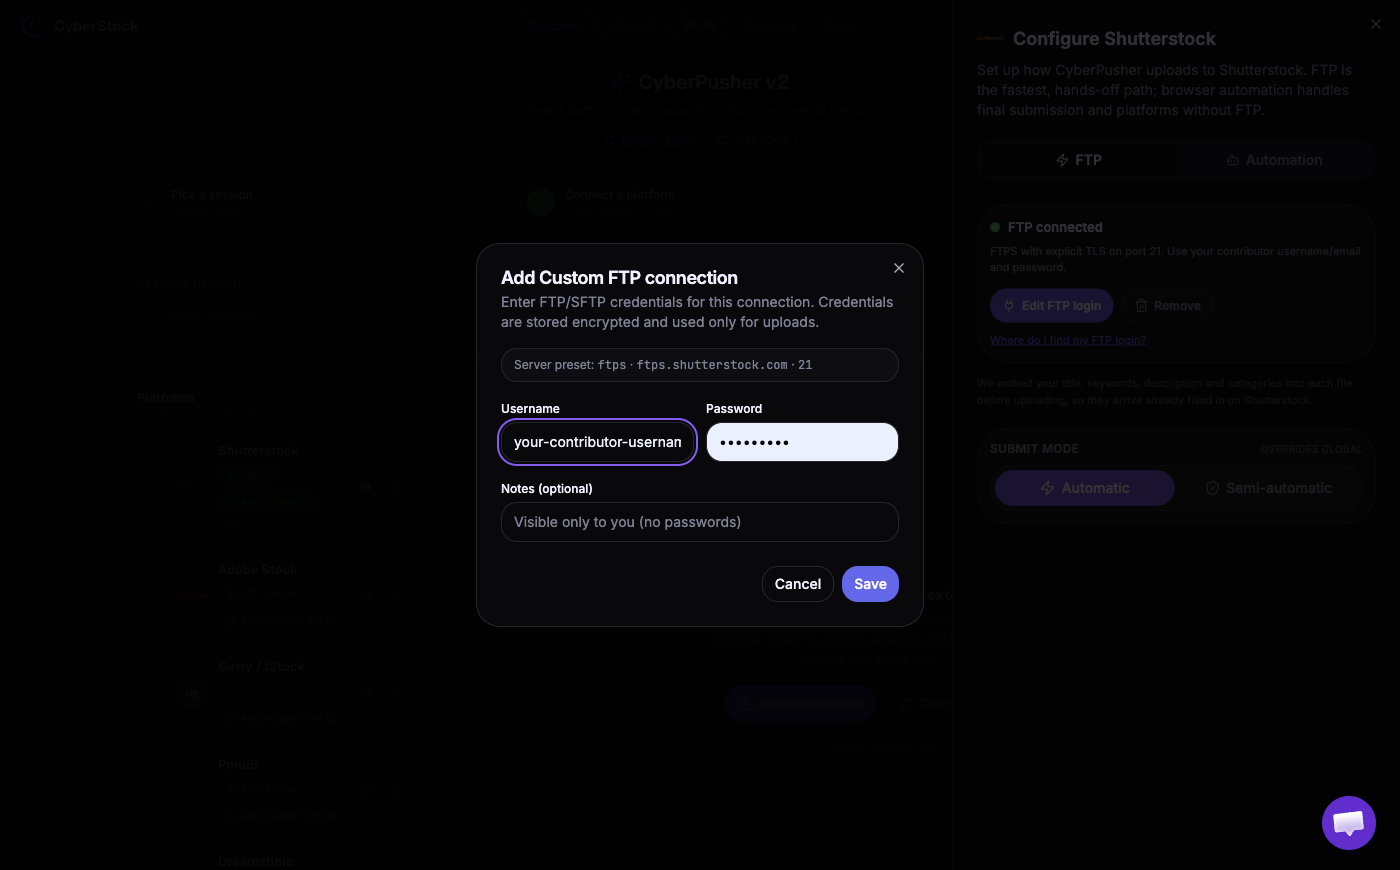
Where do I get FTP details? Each marketplace shows them in your contributor dashboard (look for “FTP” or “Upload settings”). The per-platform notes below list the host and port to start with.
Step 4 · Pick a mode & set auto-fill defaults
Before you Run, choose how hands-off you want to be (per platform, or globally):
Automatic
CyberPusher does everything — upload, fill every field, and click Submit. You don't touch anything unless a platform throws a CAPTCHA.
Semi-automatic
CyberPusher uploads and fills everything it can, then pauses so you review and press the final Submit yourself. Great while you build trust in a new platform's recipe.
Some platforms ask for extra details at submit time (for example Pond5 asks who is in the clip, the camera used, the location and the price). In the platform settings you can set auto-fill defaults once — like a default price method, location, or camera — and CyberPusher fills them every time. If your file is marked editorial, CyberPusher fills the editorial details (location, date, caption) for you; if it is not editorial, it leaves editorial off.
CAPTCHA settings (optional)
A few sites show a CAPTCHA before submit. CyberPusher can solve common ones automatically if you connect an anti-captcha service. Open the CAPTCHA button in the CyberPusher header, pick a provider and paste your API key. Your key is encrypted and never shown again.

New to this? 2Captcha is a popular, low-cost option that handles most image and reCAPTCHA challenges (including Adobe's “describe the image” check). Some challenges (like a sustained “press & hold” human check) can't be auto-solved — for those, CyberPusher pauses and lets you tap it yourself.
Teach Mode vs Run
Run
The platform already has a ready recipe. Press Run and CyberPusher does the whole push — upload, fill, submit — on its own.
Teach
For a new or custom platform, press Teach and do the upload once while CyberPusher watches. It saves your steps as a reusable recipe — then it can Run that platform forever.
Good news: most popular platforms already come with ready-made recipes — they're preconfigured, so you just press Run. A few are not preconfigured. You only need Teach Mode if you want to add a custom platform that isn't in the list. You teach it once, and it works forever after.
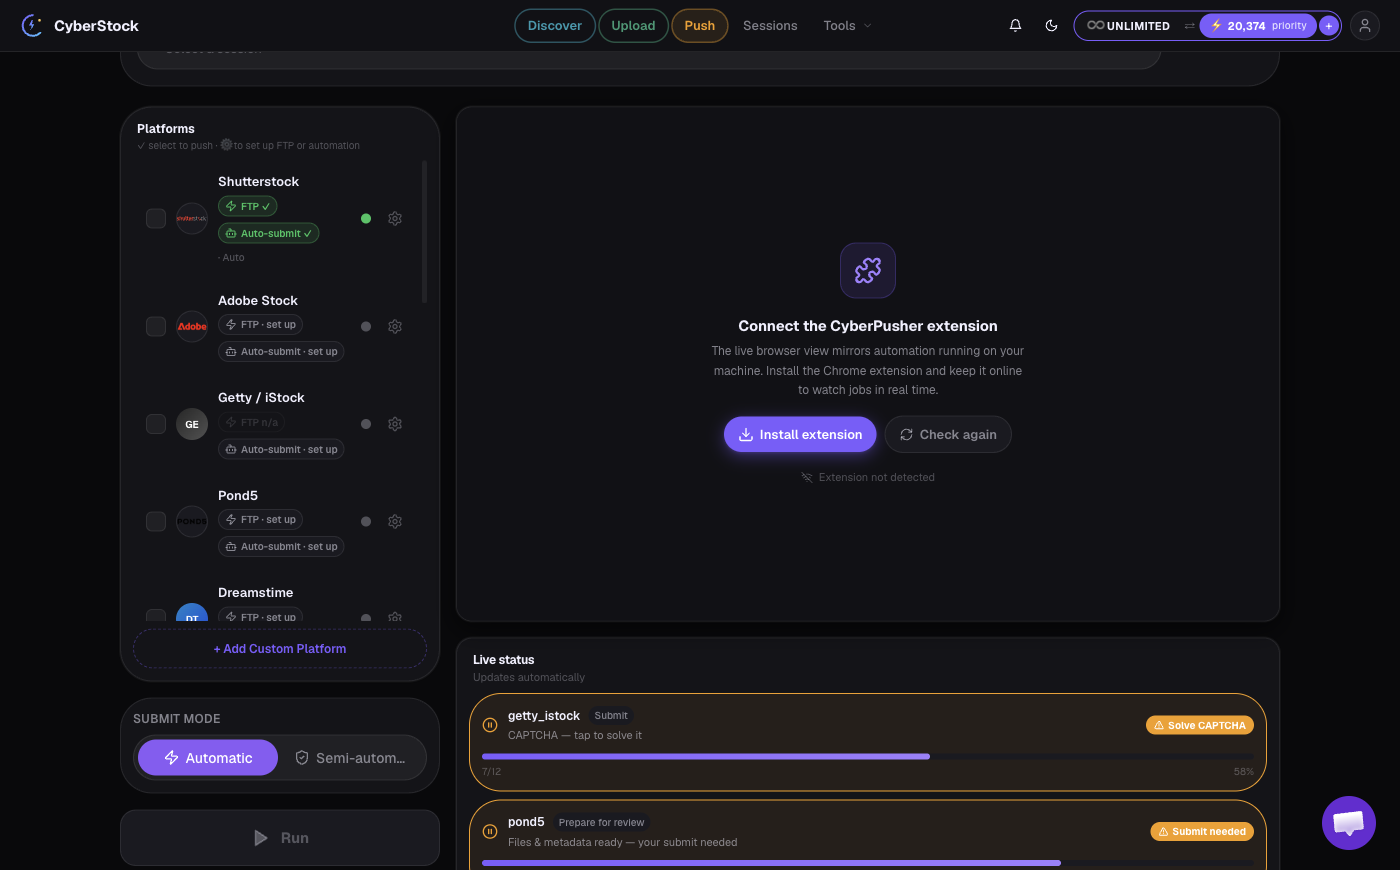
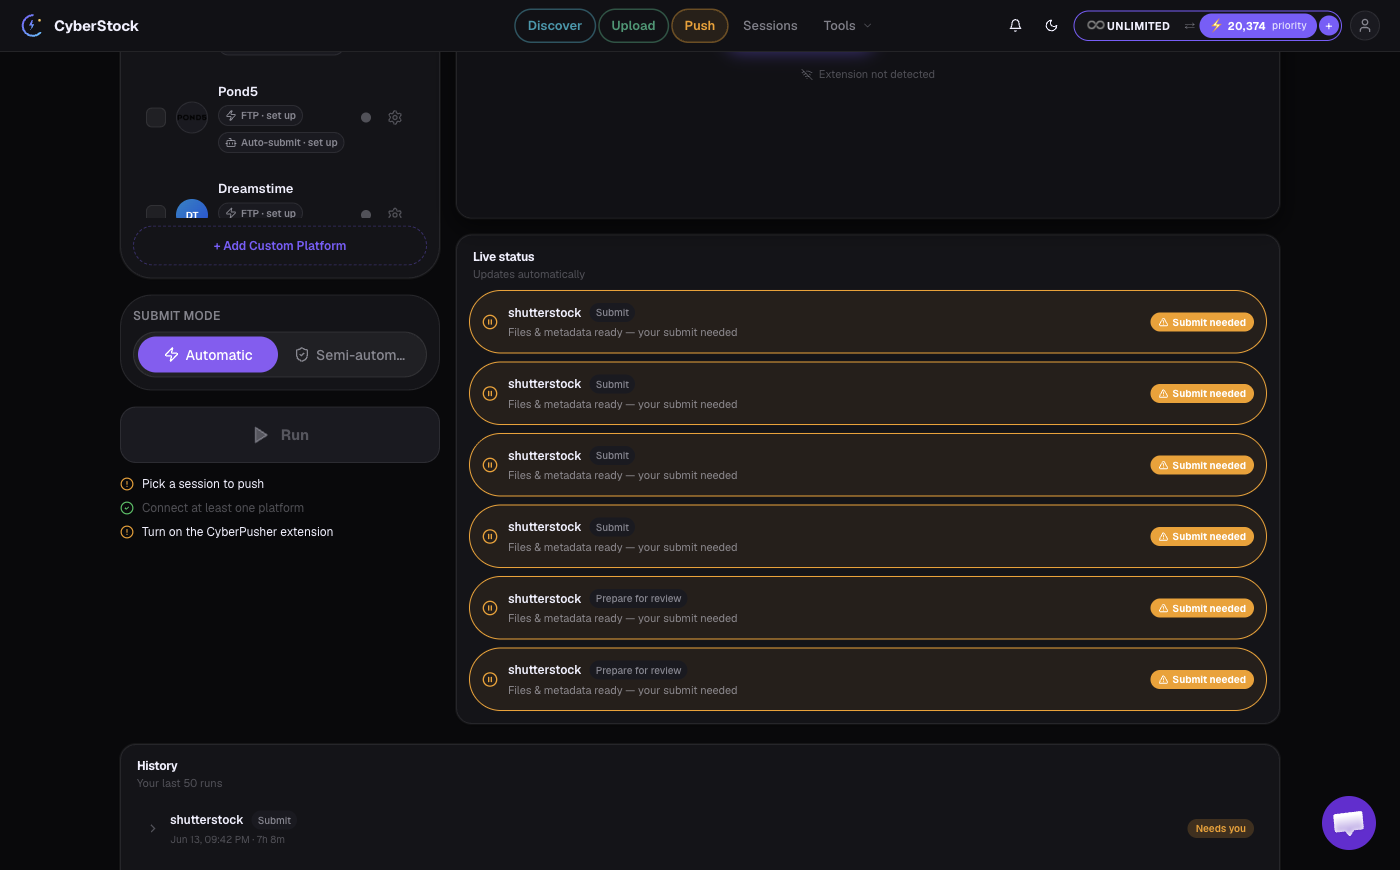
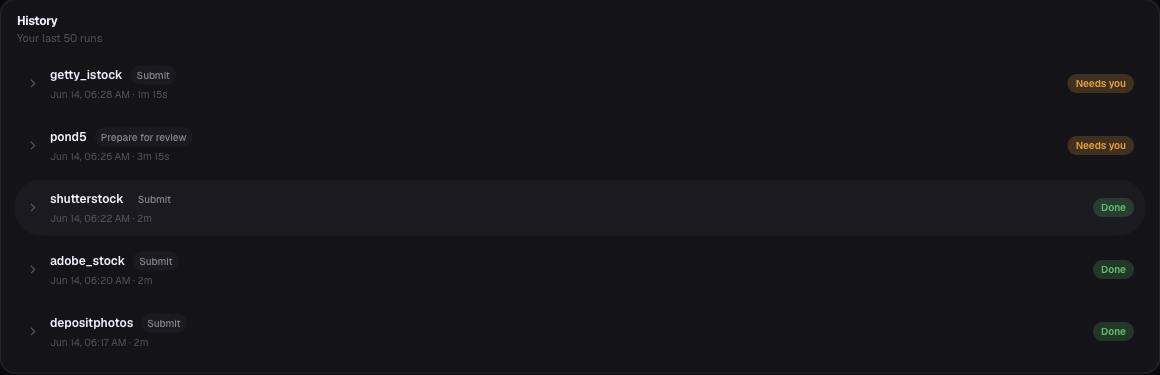
Step 5 · Run & read Live Progress
Pick a session, tick the platforms you want, and press Run. CyberPusher pushes to all of them at once (1 credit per file, any number of platforms). While it runs, each platform shows a live status so you always know what's happening:
- Green “Submitted” — done, the file is in review on that platform.
- Blinking orange “Action needed” — it needs you: solve a CAPTCHA, or confirm a manual submit. Click the row and CyberPusher brings that window to the front.
- Uploading / Preparing — CyberPusher is working; just wait.
Set up each platform
Open a platform to see how to connect it and what to expect.
CyberPusher FAQ
Ready to push everywhere?
Connect your platforms once and let CyberPusher do the uploads. 0% commission, your files, your accounts.
Open CyberPusher